Bulb types
for Christmas lights
Mine are rated 20V.
This size also used for car bulbs rated at 12V.
It is also used for a variety of other voltages, all the way up to mains.
You may also find them used in dolls houses.
Mine are 3W
outside of thread
How to rewire vintage Christmas tree lightsto make them safer |
N.B. This web page is only intended to help you work on your lights, but I don't take any responsibility for any damage or injuries which result - you need to be careful.
The main function of this page is to show how to convert from an ancient lighting set with thin wires containing rotten rubber and cloth insulation, carrying mains voltage and just asking for a visit from an insurance risk assessor, to a much safer system which still gives you some attractive old lights.
Bulb types |
|||
| Type | E5 (LES) | E10 (MES) | E12 (CES) |
|---|---|---|---|
| Rated voltage for Christmas lights |
6V, 7.2V, 12V, 12.5V, 14V, 20V, etc. | 6V, 7V, 14V, 20V Mine are rated 20V. This size also used for car bulbs rated at 12V. It is also used for a variety of other voltages, all the way up to mains. You may also find them used in dolls houses. |
12V, 120V |
| Watts | Various | Various Mine are 3W |
Various |
| Approximate width of outside of thread |
5mm | 10mm | 12mm |
| Picture |
|
||
Voltage conversion |
|||
| My set-up | Space for your calculations if different Please let me know your workings-out so I can add them here |
||
|---|---|---|---|
| Mains voltage | 240V | ||
| Number of bulbs in "string" | 16 | ||
| Therefore effective voltage per bulb | 240V ÷ 16 = 15V | ||
| Wattage per bulb | 3W | ||
| Now see what DC voltages your bulbs work with | 12V light these (E10 20V) bulbs OK and such a difference means the bulbs should last well. I also found they worked happily with 15V, 16.5V and 18V. |
||
| Re-powered using DC source | A car battery will give plenty of power. You may find a mains transformer to use but the calculations below will be needed to check you don't overload it. |
||
| Re-powered DC voltage | 12V | ||
| Ratio of new voltage to rated | 12V ÷ 20V = 0.6 | ||
| Total wattage Of course you don't have to have the same number of bulbs on your new "string" |
3W x 0.6 (ratio) x 16 (bulbs) = 28.8W | ||
| Total amperage | 28.8W (total wattage) ÷ 12 (new voltage) = 2.4 amps | ||
| Number of connectors required for technique 1 Read on to choose which technique to use |
16 (number of bulbs to use) + 2 = 18 | ||
| Number of connectors required for technique 2 | 16 (number of bulbs to use) x 2 + 2 = 34 | ||
Wiring layouts (for my set-up) |
|

|
|
What you will need -(That's if you follow all myA lot of these items should be found at your friendly-local car-accessory shop. |
|
| Your old "string" of lights. | |
| Cable - at least twice the length of your original "string". Rated to take the Total Amperage (above). Core sizes are: 0.5mm for 11amps. 0.75mm for 14amps. 1.0mm for 16.5amps. 1.5mm for 21amps. | |
| If you don't want to re-use any of the old cabling, you can buy bulb holders (with wires) from
eBay (E10 holders) Look for some that don't say LED-only and are insulated. | |
| Connectors in strips (see above for how many). The cable will need to be threaded through the holes in the connectors (including its insulation). I used 15amp connectors which gave sufficient clearance to feed the cable through, I avoided the type shown here since they cut partially through the wires. |
 ☹ |
| Fuse holder plus fuse for the Total Amperage (above) |
|
| Connectors for the power source (eg. crocodile-clips for a car battery) | |
| Your chosen power source | |
| Dark-coloured tape. | |
| Wire cutters / pliers. | |
| Stanley-type knife. | |
| Small screwdriver. | |
| Preferably, a soldering iron and solder. | |
| Worksurface you don't value - there's lots of cutting to do. | |
| Several hours. | |
| Some Elastoplast if you're not careful! | |
Working on the lights | |
|
This shows my set of bulbs which mostly date from the 70's.
|
|
|
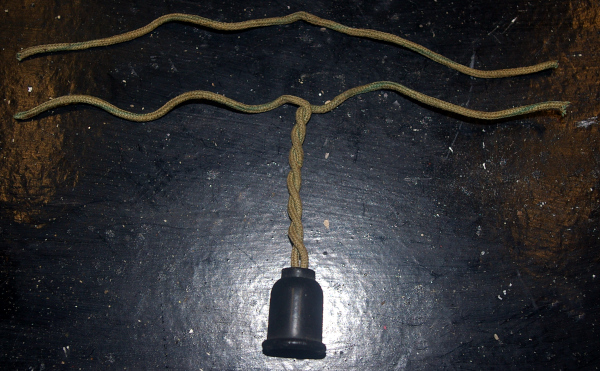
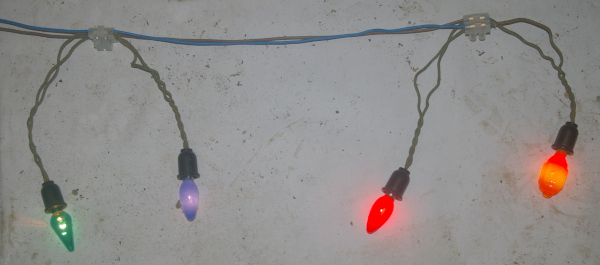
This shows my "string".
|

|
|
Skip steps 1 to 4 if you have obtained replacement bulb holders. Step 1. Use wire cutters to split up the old wires. |
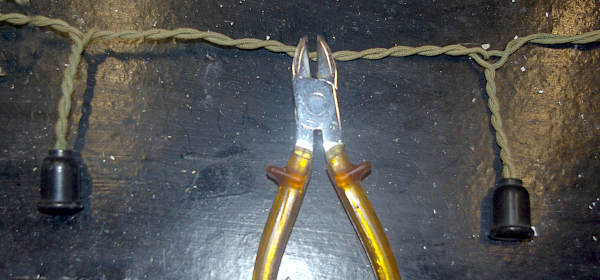
|
|
Step 2. Untwist the wires. |
|
|
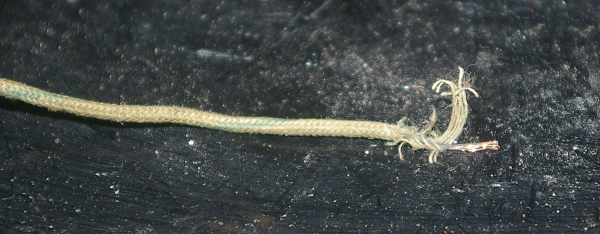
Step 3. Strip the ends of the wires using a knife.
This needs to be done very carefully since there's not much wire there to start with. |
|
|
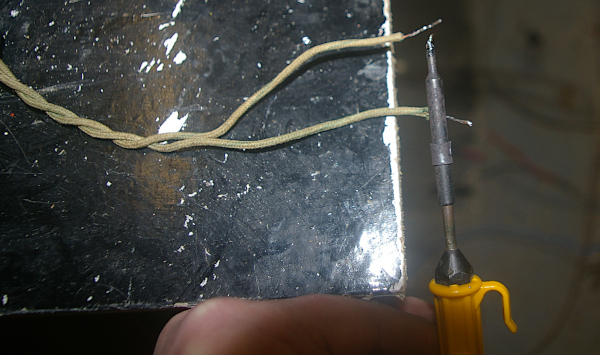
Step 4. Solder the ends.
The ends are quite filmsy and old. |
|
|
Step 5. This is a good stage to loosen the grub screws in the connector strips. Now make connection points in the first of the new cables. The first point will be at the end of the cable. Measure the position of the next one. Cut two slits around the insulation to fit a connector. Slice along between the two slits and then pull off the insulation. |
|
|
Step 6. Solder the connection points. Solder will reinforce them and provide a better contact. |
|
|
Step 7. Join up the first cable. Feed the first cable through the same side of pairs of connector strips. Insert one end of each light socket wire into a connector, overlaying the end over the cut-out in the cable and tighten the grub screws. Give the wire a light pull to make sure it has connected. |
|
|
Step 8. Join up the second cable. Feed the second cable through the other side of the pairs of connector strips and complete the connections.
|
|
|
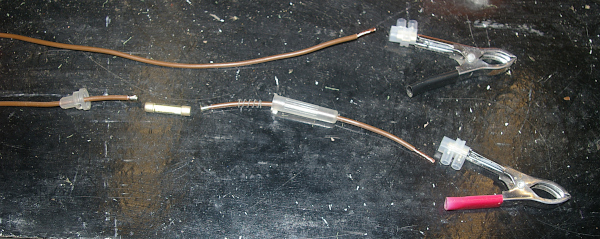
Step 9. Fit the connectors for your power source. Here's my set-up to suit a car battery. |
|
|
Step 10. Here is a part of a set made up with technique 1.
All that's left to do is to wrap wiring tape around the wires coming out of the connectors. |
|
Please let me know if the above helped, or if you found any mistakes or better solutions (see below).
| |
This page last updated 15th. November 2020.
Images and text © Copyright Jim Batten, 2019-2020.